
Wing of the Redeemed
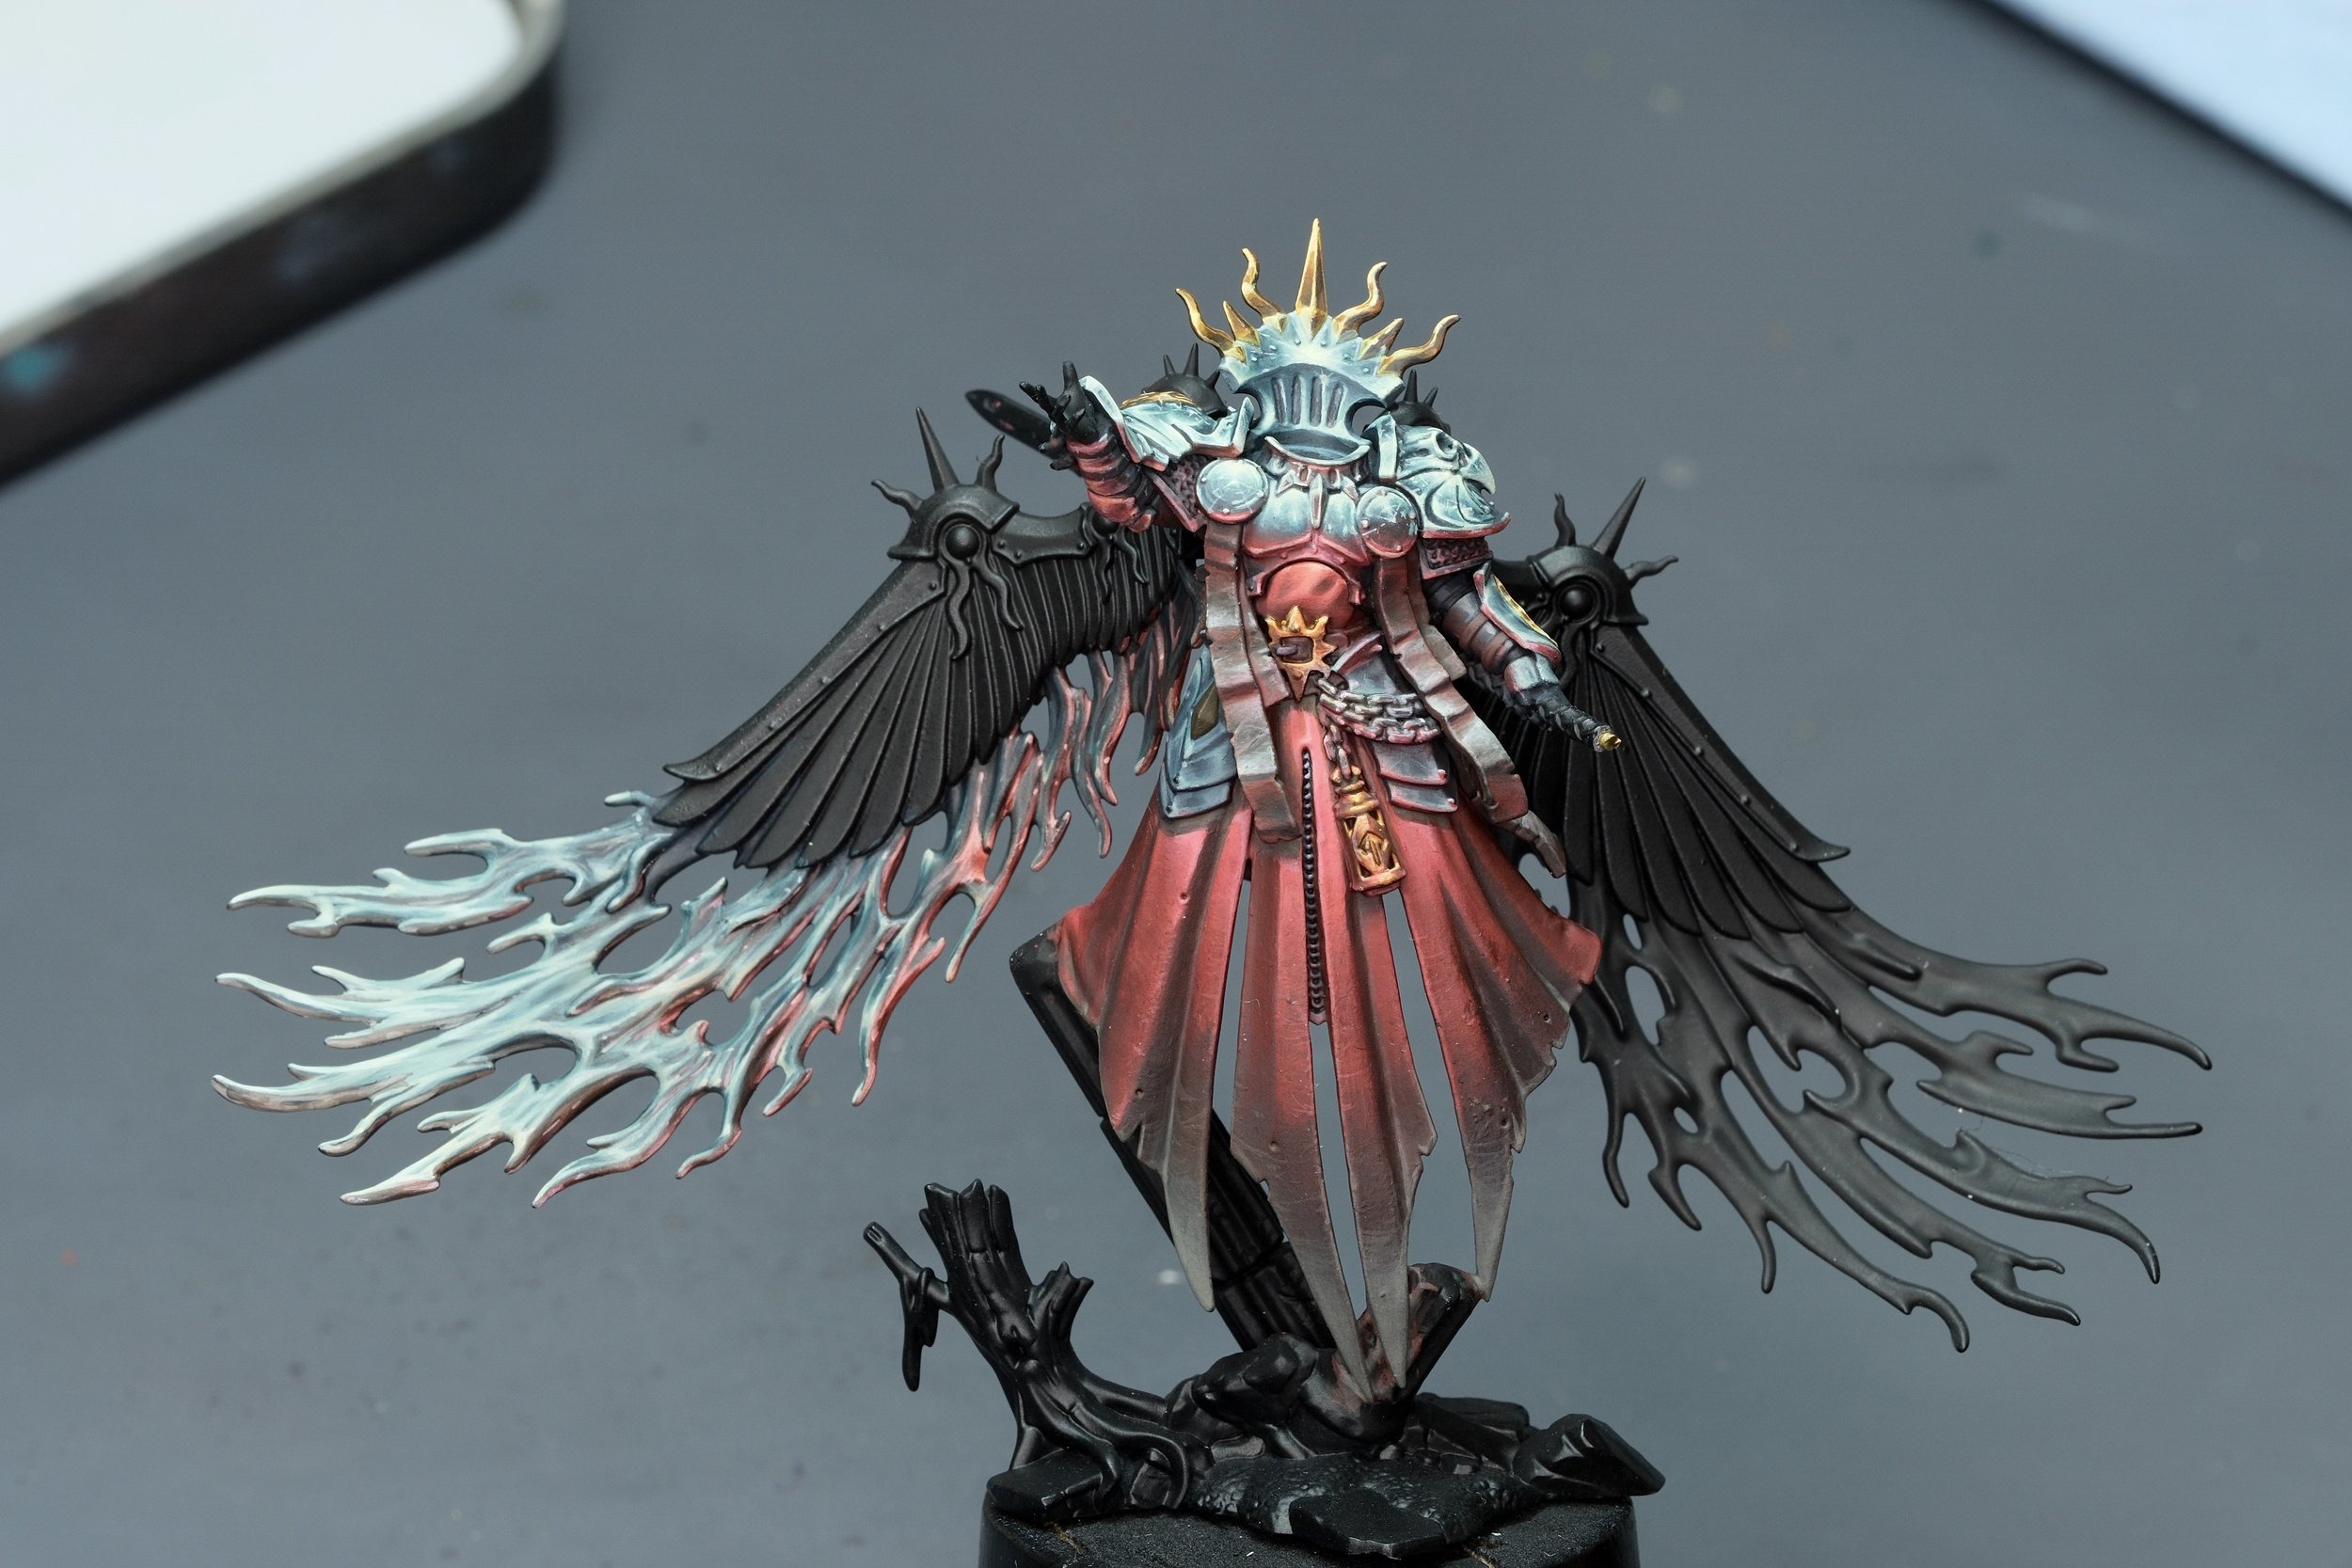
By now it shouldn't be much of a surprise to get another Tornus update, as we are approaching the final month before Adepticon! The start of his wings is on display in full effect with a test mount to see how it all aligns. The concept is about mashing the idea of liquid metal flames and giving the model a new illustration of NMM that is directly related to his armoured suit. This has to be one of my favourite explorations of NMM to date, making what is normally a "hard surface" and re-imagining it into one that is fluid and flowing. The closest material I can think of that this resembles is a shiny silk cloth. It's a pleasure to follow its flowing curves, and cross interactions from various light reflections that give energy and excitement to the piece.

1. The process of painting this liquid metal effect can be broken down starting with a general mapping of the flame's highlight area. Utilizing the same nmm colours in the armour and studying my light reflection reference, the "Key Light" illuminates the main grouping that is closest to the outstretched portion to the longest middle. Here I only bring the light to 75% of its total brightness and group that area as the largest highlight. With each flame, the portion is in the general shape of elongated and flexible pipes/cylinders that contain a rounded plateau that faces forward. This is shown as all my highlights are essentially running length-wise from left to right as is the general direction that these cylinders are facing. The further away we get from the Key Light area, the highlights get smaller as I look for the apex of curves for placement. Until we get to the right side of the flames which is closest to Tornus, it is dominated by shadow tones.
2-5. It's a process of placing in half-tones or bridges to help in transitions, refining the sketch, as well as going up another stage in highlight to further create volume and shine. It's here we will have the main highlight locked in and we should be pleased with its value placement. Leaving room for where the red will be on the right side, as well as the lower downward facing in shadow, to give us room for other neutral light reflections.
6. Here we have a small sliver of room for the neutral brownish ground reflections that come from the remainder of the scene which can include the tree stump and ground foliage. It's not much, but all these little tonality reflections help sell the effect and considered.
7-9. We now finally get to slide into the drama of the red reflections that are directly related to his red cloth. Taking the same colours used in the cloth with a small pinch of blue to help marry these elements together, we place our light reflections. Thinking in opposites to the Key Light, as we lean to the right to initiate the intensity there. Bringing balance between these 2 main plays of light reflection. When our values of the highlights are set, I then take an airbrush to help give a glaze of colour back into the piece to help bring some saturation back from what can be lost in the highlighting process. It also helps unify the work underneath and gives a bit of a softer transition into the area. Final highlights are given in small concentrated areas but purposefully left short to gauge max shine when the mechanical part of the wings will be painted next.
Just like the rest of this project, completing this section to a 95% completion and leaving room for some blending corrections with a second pass, and when it comes to very pointy outward areas of the miniature. I purposefully leave the tips in a rougher less polished state. This is due to these areas getting worn throughout the painting process, and there will inevitably be little touch-ups and patches needed. So I don't stress on these and I'll come back to this once all of the wings are painted and ready to commit to glue in its final resting place.
Hope this explanation, along with the staged photographs and armed with your familiarity of the palette tones from part 1 with his armour give you a more rounded idea of how this was approached. It's also noted that this wasn't the first time I've tried this effect, as I've done several practice attempts on another set of similar wings on the Stormcast Prosecutors. Trying new approaches, failing a LOT, and learning valuable lessons each time to what I've arrived at here. That's all for the wings for now, it's back on the brush with only 27 days on the Clock! Happy painting :)
Bb